Looking to create a little more of that elusive studio sound in your mixes? This tried and true technique might help.
Parallel compression has helped me fatten up my vocal tracks, or make my drums more full sounding, and I’ve even used on all instruments in my mix to make the production sound bigger.
Veteran mixing engineer and audio educator Lorne Bregitzer gives us the skinny on Parallel Compression.
This will work for anything listed in the menu area of Pro Tools. Even if there is already a keyboard shortcut assigned! This works in all Mac OS and Pro Tools systems slightly differently. But the steps are all pretty similar. For Windows systems I believe the process would be very similar. See Sound on Sound article here.
Here in a forty second video, I demonstrate the process.
STEP BY STEP INSTRUCTIONS
Before After
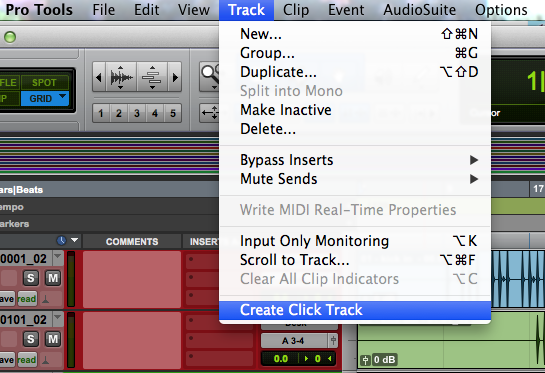
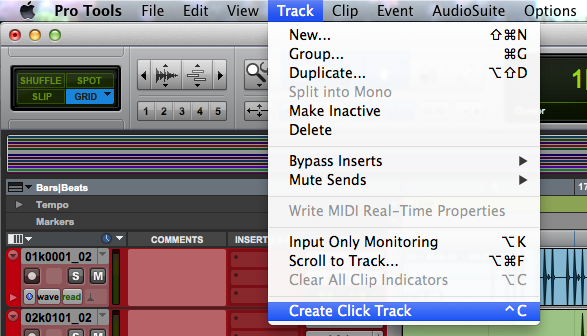
1. Identify the menu item needing a custom shortcut. Make note of the EXACT wording, spelling, capitalization, and spaces.
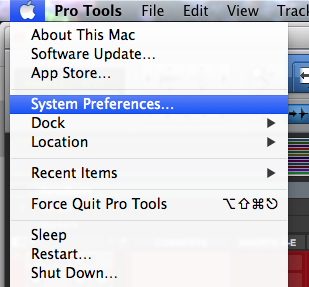
2. Mac/System Preferences.
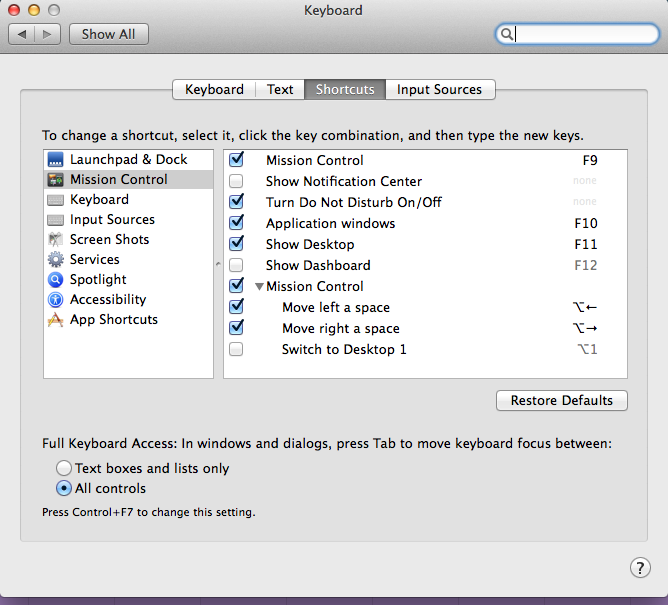
3. Select KEYBOARD preferences.
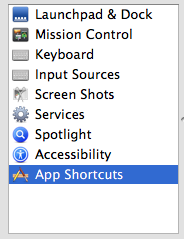
4. App Shortcuts in the left column.
5. Select the + button.
6. If the Application is not in the drop down menu at the top, go to the bottom of the list to “Other…” and you can add Pro Tools.
7. Type in the exact name of the menu command for the Menu Title. Choose a new (unused) shortcut.
8. Go to Pro Tools. Behold, and experience the magic.
On a similar note, there are companies and individuals that create software for macro commands. Meaning that you hit one key, and in the software it can do a series of things. For example, you could hit Option-1 and the software would run a script of actions: create eight stereo aux tracks, inputs sequential, four different compressors on each, with custom settings, a reverb send, with custom setting, set up a parallel compressor for one of them, create custom track colors and names for them.
One (of many) ways to accomplish this is with Slate Batch Commander.
There are other options that run keyboard scripts. So if it’s a series of keyboard shortcuts that you can program in, that series can be reduced to a single hotkey! Keyboard Maestro ($35 US) is one that seems to be highly recommended.
So you’re interested in buying a talkbox? Or perhaps you own one, but are not satisfied with the results you are getting, and you’re left wondering if you can do better?
Maybe you’re a fan of Daft Punk, and you’re wondering how they get their melodic robotic vocal sounds?
Well, in any case, you have come to the right place.
As far as I know, this is the first and only talkbox shootout on the internet.
{patting myself on the back}
Here you go:
Three of the most popular talkboxes, in the same place, used by the same performer for the same lyric and melody. I was striving for clarity of lyric, adjusting settings for each device for maximum clarity.
Here is the uncompressed audio file of the blindfold shootout.
This producer duo DaDa Life explain their techniques for using and recording with a (Banshee) talkbox. Fast forward to the 20 or 24 minute mark, and you’ll see/hear them demonstrating how they use and record the talkbox. This was one of the most helpful bits of information that I found in my research. Thank you DaDa Life and Future Music Magazine!
Make sure to check out Future Music Magazine’s – YouTube channel. Get a cup of coffee, kick back, and watch as an electronic producer walks you through their production process, with tips, plugins, tricks, techniques ….. you gotta love the internet!
Creative Audio Production on iTunes (free episodes of the podcast). The podcasts are a few years old now, but the creative ideas, tips and tricks are timeless.